So, for the part 2 of this review kit will focus on few things which are the detail, structure and the assemble process. Lets start with the detail for this kit, since this kit was come release during 2007 where lot of ver.2 U.C series MG released such as MG Mk.2 ver.2 and MG Zeta ver.2, the inner frame for this MG Strike Freedom was improve a lot from its predecessors MG Freedom. Unlike the latest RG which improve the detail of the outer armors, this generation was emphasize more on its inner frame details compare to the latest generation. (basically we can't expect any ver.2 of this will release in the coming... 5 years maybe)
In terms of the structure design for this kit, there are lesser ball type joints but replace with multiple socket joint. Since the MG freedom was suffer a lot from its weight issues (especially the wings), I think this is one of the major improvement in terms the joint to give the entire kit sturdier. (will discuss this more in part 3 of the review).
MG Seed/destiny series can be said the most famous in its sliding armors mechanism especially the tights and knees. These are the most complicated part in the assemble process but the hardest one will be the wings unit (will show more from the photos below). As for others, it pretty straightforward.
This is beautiful part of this kit which inspired lot of people to do armor trimming, inner re-build on the outer armors to show the shining gold inner frame.
Most of the joint allow arms and legs bend 180 degree.
Detail beneath the armors.
sliding mechanism for the knee.
Above two pictures explain why the structure of the wings complicated. Overlapping sliding mechanism while the parts were not strong enough to hold the weight. The parts use to make the inner frame for this MG Strike freedom since softer than the MG Freedom (i'm not sure is this true or not but i broke one of the wing unit from the first MG Strike Freedom i had).
The most important but fragile socket joint from the wing unit. This is the parts that i broke from my first MG Strike Freedom and once the joint spoil, it will be very hard for the other parts of the wing twist and hold upwards.
Other than complicated assemble process from the wing unit, another annoying parts will be the Dragoon. Come with 8 sets and 2 parts each sets (luckily its only two parts per-set). Three nub marks per-parts means 8 x 2 x 3 equal two 48 nub marks to clear.
And this is the complete one (backpack).
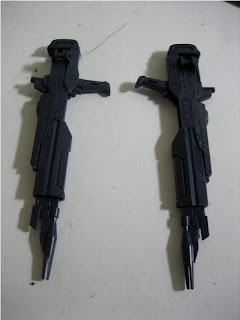
Although both beam rifle are the same but since it can be combine, the mechanism for each beam rifle is a bit different. from the parts show here.
The right beam rifle come with sliding mechanism on the front and turn-able censor at the back.
As for the left beam rifle will have expandable supporter.
Basically that's all for the part 2, proportion, articulation and poses coming next. Stay tune


No comments:
Post a Comment